Bench For Entryway | DIY Bench From Scraps!
Something I always try to strive for when starting new projects is making sure I can keep my projects budget friendly. Not everyone has endless amounts (and with the price of wood right now, it’s even tougher) of cash to do projects daily so I really strive to ensure the projects I do are ones that are achievable to everyone. One of the great ways I do this is by using up as many scraps as I possibly can because, honestly, who doesn’t have scraps laying around? Not only does this make my wallet (and my husband) happy, it is also a way to reuse and recycle wood ( Earth day, anyone?) that would have otherwise been tossed in the trash.
Currently, I am renovating my garage to be more of a functional workspace for me and my family. The stairs have been a nightmare since I started the renovation last summer but was seemingly put on hold for a sponsored project. This left the stairs with no railing, very rickety, and with no place for our kids to sit and hangout while myself or my husband worked in the garage over the winter. After a few weeks of rebuilding risers, adding new treads, paint, and railings, I finally had some time to spend making a seating area with a bench in the entryway. The landing isn’t large so I knew the bench had to be small.


Here is how I made it!
Entryway Bench Supplies:
- 4 – 2 x 3 – Cut to 18in
- 2 – 2 x 3 – Cut to 7in
- 2 – 1 x 2.5 – Cut to 7in
- 2 – 1 x 3.5 – Cut to 19in
- 1 – 1 x 12 – Cut to 24in x 11in
- Stain of Choice (I used Aged Barrel by Varathane)
- White Wash
- Brad Nails
- Screws ( 1in and 2in)
- Wood Glue
- Polyurathane


Tools For This Project:
- Brad Nailer
- Drill
- KregJig for pocket holes
- KregJig Drill Bit
- Mitre Saw
- Sander
- 12in and 24in clamp
How to Build An Entryway Bench:
Step 1:
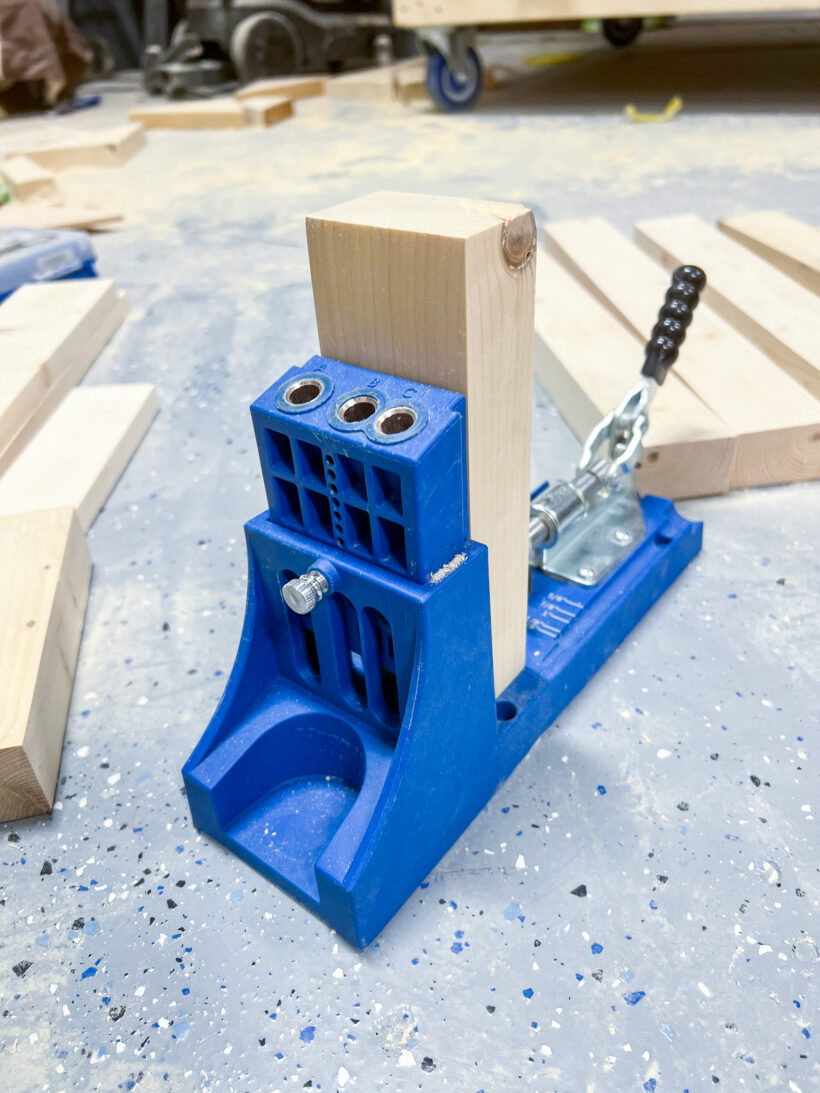
Once all your pieces are cut and sanded smooth, it’s time to start putting pocket holes in so you can attach the pieces together with no screw holes showing. Each cut above will require 4 pocket holes (2 on each end) EXCEPT the 18in legs and the top board (24in board). The newest model of KregJig will automatically set itself based on the thickness of your wood but if you are like me and have an older style, you’ll want to set your jig and drill bit to 1 1/2in for the 2×3 pieces, and 3/4 for the 1 x 2.5 and 1 x 3.5n pieces.


For the 2 x 3, you’ll need the 2 in screws, and for the 1 x 2.5 and 3.5, you’ll need 1in to 1 1/4 in screws.
Step 2:
Take the 1 7in – 2 x 3 and 2 18in – 2 x 3s and lay them flat on your work surface. Make sure the pocket holes on the 7in piece are on the bottom. Clamp both legs to the 7in piece, putting wood clue where they meet. Screw in the pocket hole screws (2in screws)
*It’s important to make sure the bottom is completely flush to avoid a wobbly bench seat. *


Do the same with the other 2 legs and 7in piece. Once those pieces are assembled, take the 1 x 2.5 pieces and join the top of the legs. Make sure to use the clamps. You can either centre those pieces between the legs or do what I did and make them flush with the sides. Glue and use the 1in screws. When finished, you’ll have your legs!


Step 3:
This step is a repeat of the last step but you will not attach the legs to each other using the 19in 1 x 3.5. Again, you can either put this centered to the legs or flush with the legs. Make sure to use glue where the board and the leg meet. Use the 1in screws to join.


Step 4:
You can choose to attach the seat now or wait till later. I stained the base first using Aged Barrel by Varathane. This is a stain that does not require pre-conditioner but depending on the type of stain you choose to use, make sure to read the can whether or not it needs that extra step to prevent blotchiness.
If you decide to attach the seat before stain, run a bead of wood glue along the top frame of your base. Place the seat on top and use brad nails to secure. You can also use L-brackets underneath to attach the seat to the frame.


When I was done staining, the stain with the pine gave off a bit of a greenish tinge so I did go over with a light white wash to give it more of that “aged” look. Once your finish has dried, add polyurethane to protect the surface and you’re finished! Easy bench in under 1 hour and completely free!
Will you make one?


I hope you enjoyed this entryway bench project! Cheers!
Jenna
Instagram: FromHouseToHomeDIY
Blog: www.fromhousetohomediy.com
TikTok: FromHouseToHome


