Our DIY Landscape Lighting | Ideas for Outdoor LED Landscape Lighting
Our DIY Landscape Lighting Ideas
We’ve done a few outdoor DIYs before, but nothing involving this much wiring, so we decided to call a professional. Our original quote for professional landscape lighting was $250 per light. For the look we wanted, that would have meant $6200 total! After our call with the electrician, Brad did his own research and learned we could get all the parts ourselves for just $750. That’s a $5500 difference!
To determine that price, we planned out where we wanted our lights to go and measured how much wire we’d need to make it happen. This required some math (and a few hours looking at inspiration on Pinterest), but we knew the results would be worth it.
How We Calculated the Number of Lights We Needed
When you’re working with electrical, you have to make sure you don’t overload your transformers. Here’s how we calculated how many lights we could use.
We purchased a 200 watt transformer that plugs directly into our outdoor outlet. We don’t ever want to load it more than 80%, so we limited ourselves to 160 watts in lights. Since each of our lights were 5 watts, we could install 32 lights on our transformer. Easy peasy!
So while we were a bit intimidated by all the parts and pieces, we decided to go for it! It does involve some wiring, but it’s not full-on electrical work. That being said, always consult a professional before you start interfering with your house’s wiring!
How We Installed Our Landscape Lighting
Step 1: Run the main wiring.
First, we ran the main wiring all around the house where we wanted the lights to be. We placed a 12/2 gauge wire along the front of the house, and then ran it down the side to the main power source. Make sure to lay the wire exactly where you’ll end up burying it so you don’t over- or underestimate how much you need.
Step 2: Place your lights.
Next, we placed our lights in the landscaping facing towards the house. Place them 12-18 inches from the side of your house depending on how much of a shadow you want. Just be sure they’re evenly spaced!
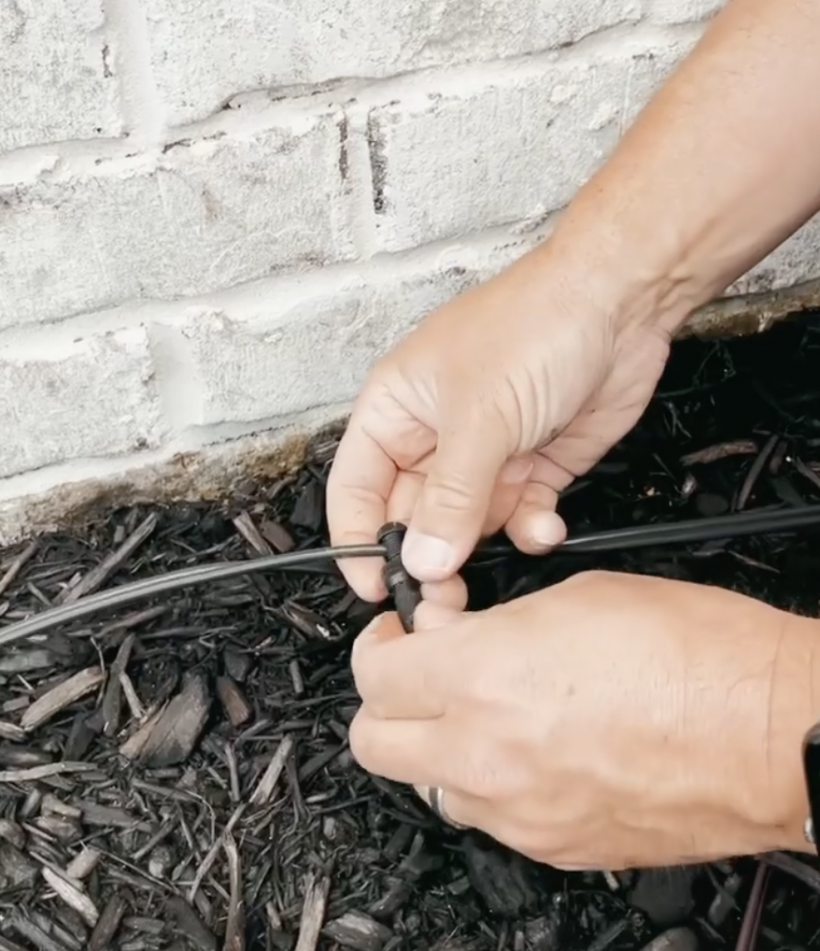
Then, Brad connected the lights to the wires. These lights include connectors and plugs to attach them to the main wire, so it’s actually pretty easy to install them! We also picked up a path light kit for our front walkway.
Once we got the hang of it, we were able to breeze through the rest of the lights around the house. We had about 20 lights, but you might have more or fewer depending on the size of your house and the light layout you choose.
Step 3: Test your lights!
Wait until nighttime, and then plug your lights in! It’s important to test them before you bury the wire to make sure everything is connected properly and you like the look.
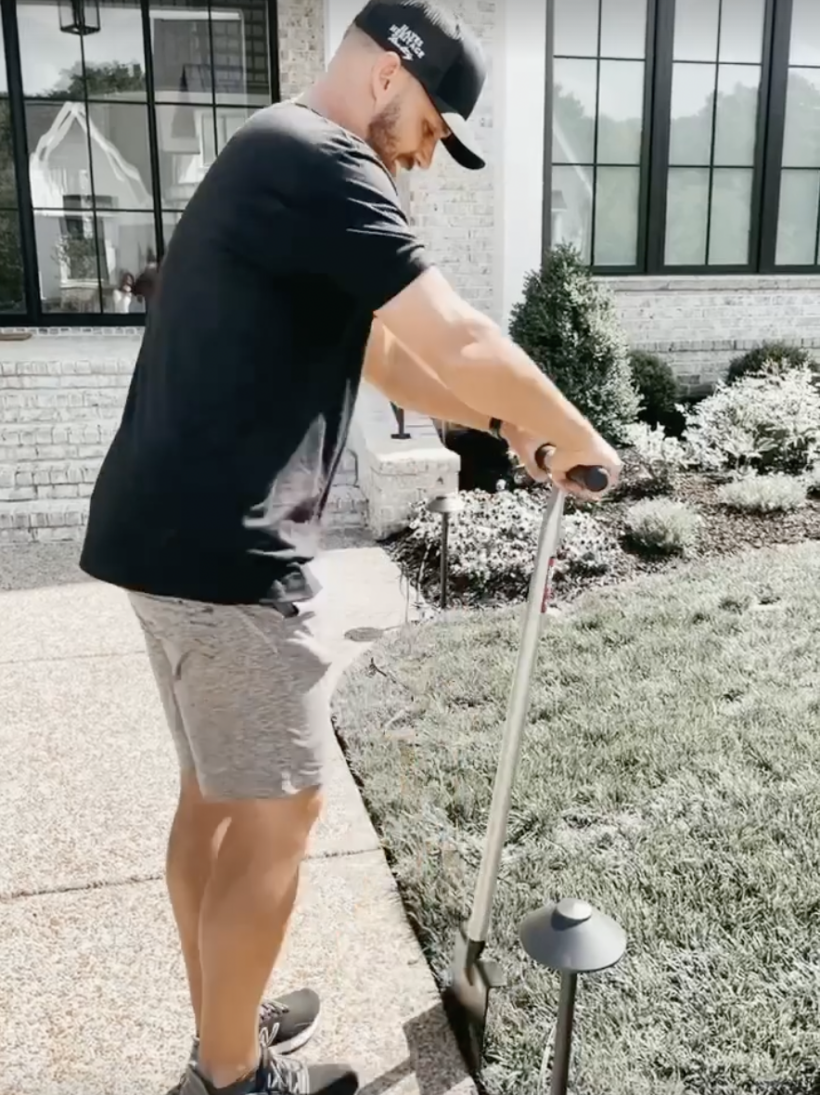
Step 4: Bury the wiring.
We used a spade tool to bury our wiring along the edge of our landscaping. Make sure you bury it deep enough that you won’t hit it with your mower or edger. Then, just replace the dirt and grass, and you’re good to go!
Step 5: Set your timers.
Our transformer has built-in timers, which we love! If you can, definitely splurge for a programmable transformer. Trust me, your electric bill will thank you!
Our DIY Landscape Lighting Results
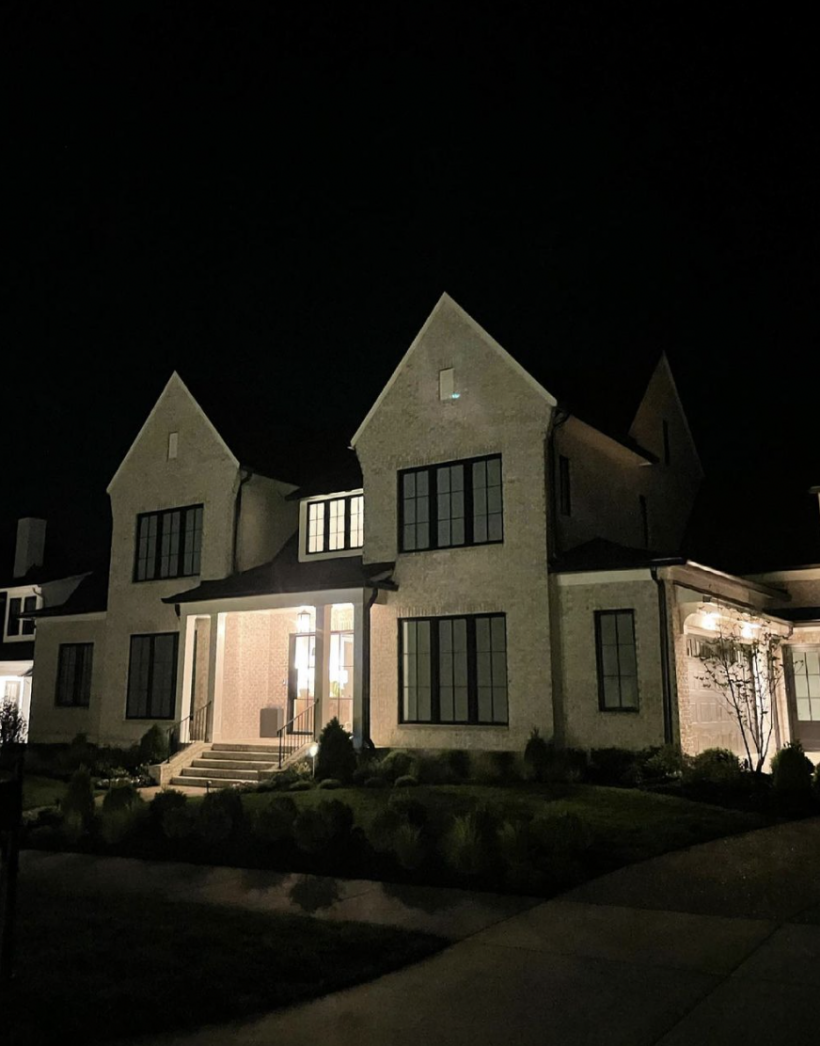
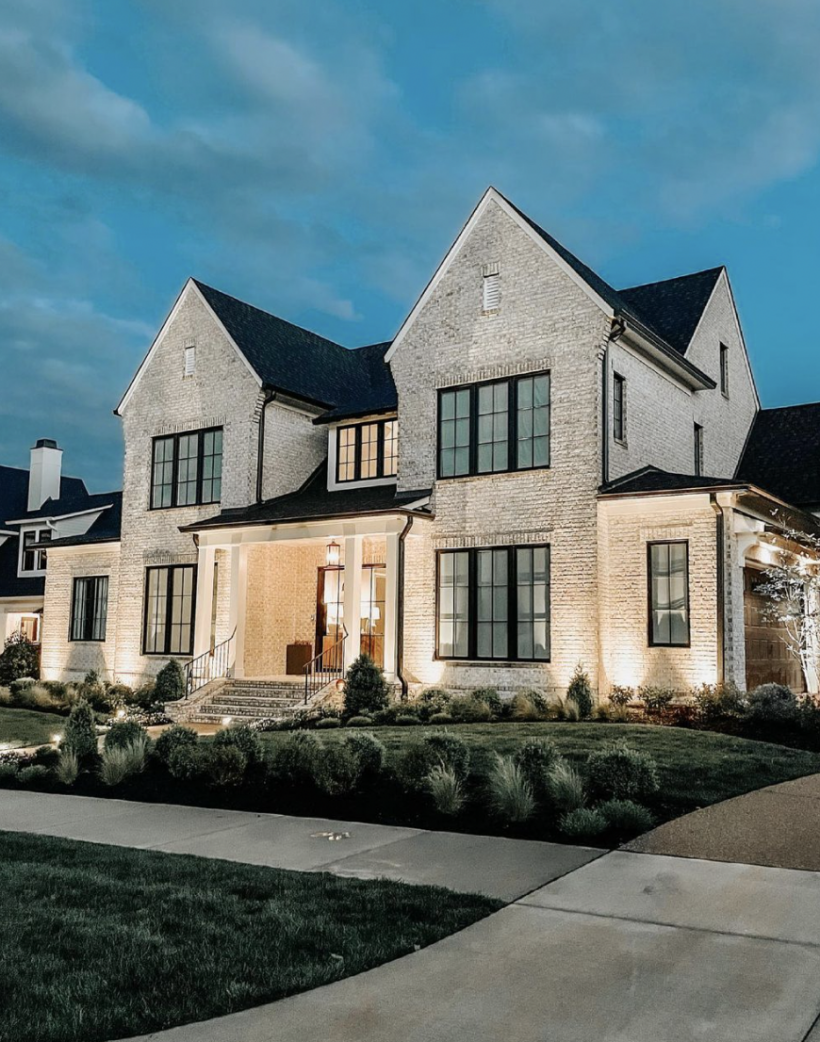
In the end, our landscape lighting project was a huge success! Not only did it save us a ton of money, but it added tons of curb appeal to our home. We’ve gotten several compliments from neighbors, and we love getting to tell them we did it all ourselves.
Want to DIY your own landscape lighting?
Here are the supplies we used on ours! And be sure to check out our Instagram story highlight to watch our process.