DIY Picture Moulding
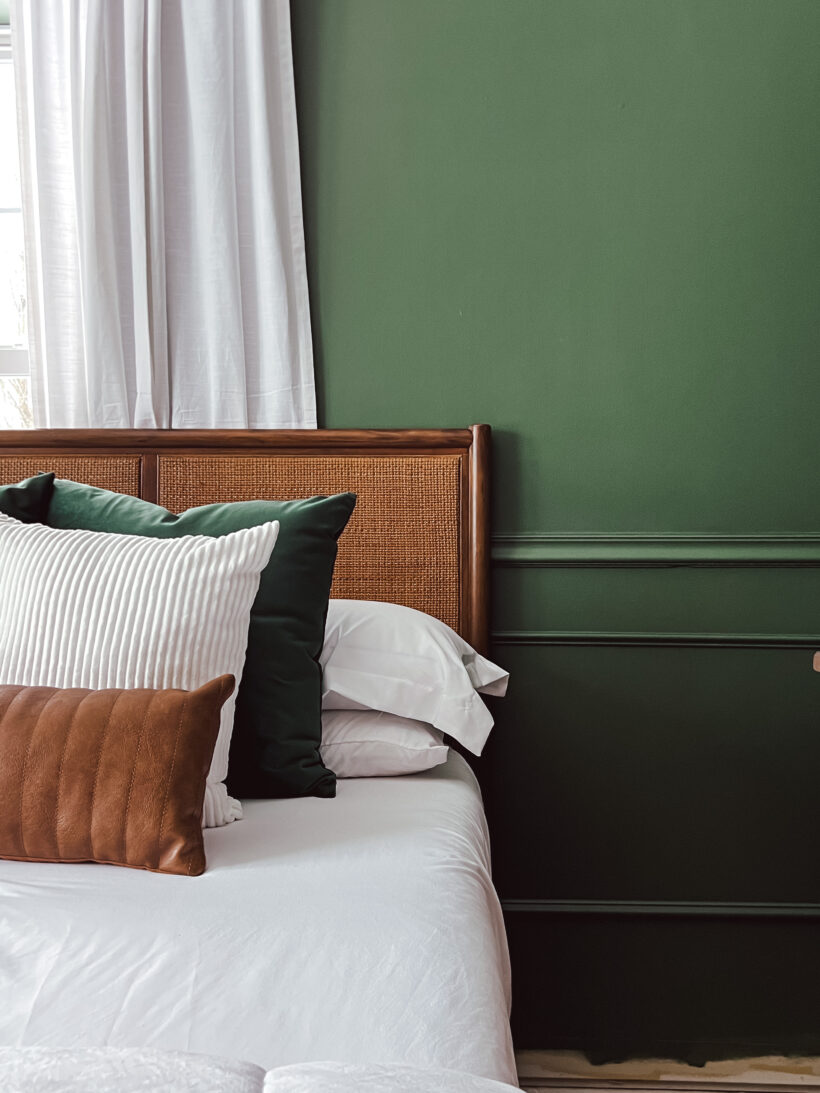
The picture moulding in the guest room is complete! What’s really great about this project is that it is not only affordable, it’s also beginner friendly. I wanted the guest room to be different than any other project I’ve ever done. I stepped out of comfort zone with the paint color (Backwoods by Benjamin Moore) but I also went with a traditional look rather than modern. Taking your baseboards off is not necessary. I am replacing the floors so it was easier for me.
Materials for Picture Moulding:
- Miter Saw (miter scissors can also be used)
- Nail Gun
- 5/16 in x 11/16 in x 8 ft Basswood Panel Moulding (amount varies depending on how many walls you do)
- 3/8 in x 1-1/4 in x 8 ft Basswood Panel Moulding
- Wood Filler
- Caulk
- Level
How To Create DIY Picture Moulding:
- Grab your materials sourcing from the list above
- Make your cuts depending on your wall size and box length
- Nail your cuts into the wall
- Fill your nail holes
- Paint the trim your desired color
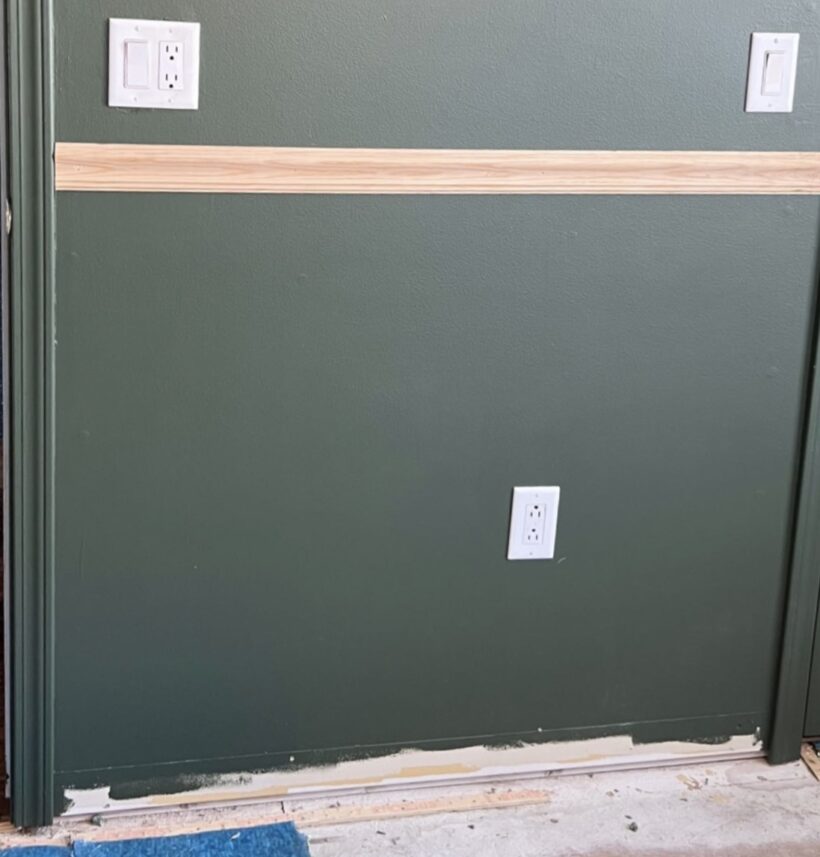
Math and Cuts
This is probably the most boring but crucial part, what your dimensions are going to be. There’s a rule of thumb that it should be one-third of your wall.
Every wall is different but this is generally 36 in-48 in, including any trim. I decided to use 42 in for the height of my chair rail because I will be adding 5 in baseboards.
The chair rail math is pretty easy, just measure the width of the space. Next, I had to figure out where I wanted the picture moulding below the rail. I chose 5 in from the rail and baseboard height. I used a pencil to mark where each piece was going to go.
You want to make sure that all your vertical cuts are the same length and change your horizontal cuts according to each wall/size of picture mould. You’ll want to change your miter so it cuts at 45 degrees. This is going to give it a seamless look, as opposed to keeping a straight edge.
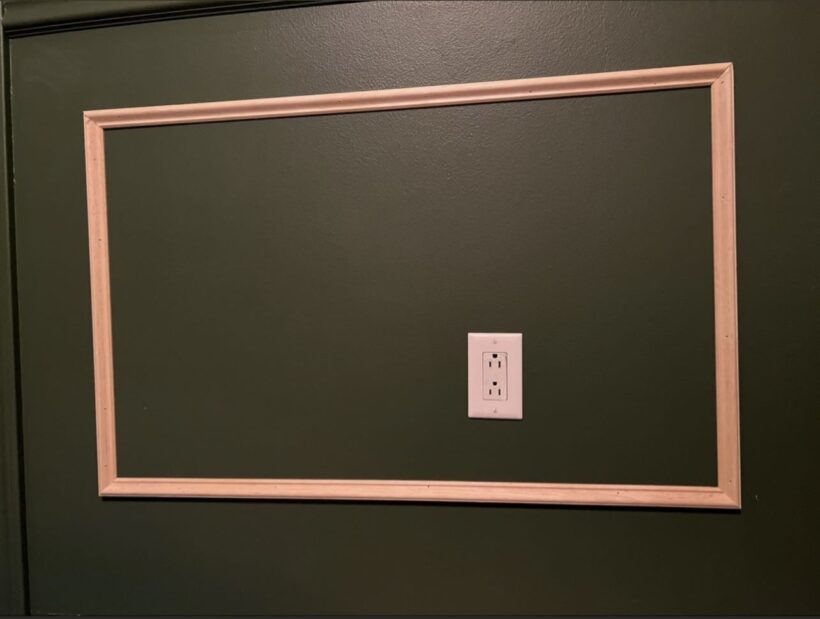
The Fun Part
Install time! Because you marked your walls where each piece should go, take your first piece of trim and level and nail into the wall. You can either nail into the studs or if you’re like me and change your home frequently you can nail at an x. Repeat for each side and each section you’re adding moulding too.
Finishing Up the Trim
Lastly, I filled all the nail holes with spackle, you could also use wood filler, and then sand it for a smooth finish. I used a fast drying, paintable caulk for the sides and corners of the trim. Another rule of thumb, filler for flat surfaces and caulk for angles. Once the caulk is fully dry you can go ahead and paint the trim/wall the color of you choice.
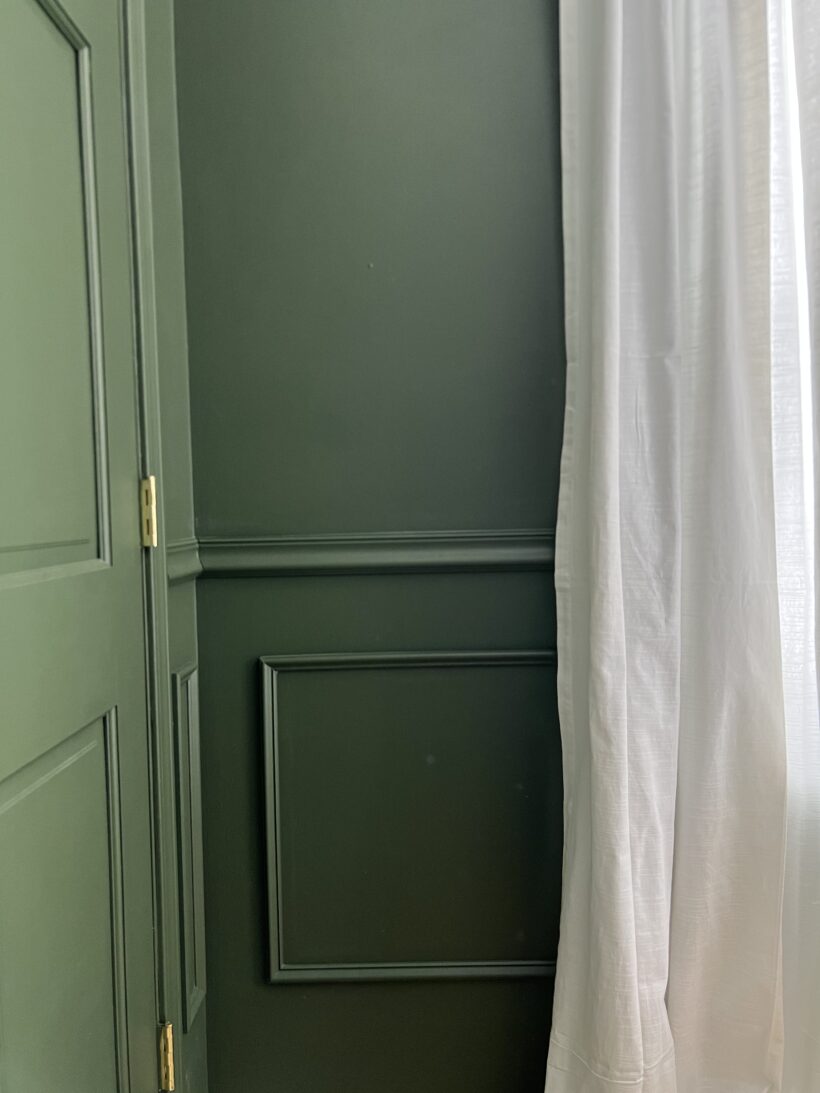
The Finale
I really enjoyed this project. It cost me less than $100 (I had all the tools) and took me a total of three days to complete (with little rascals needing their mama). It adds so much to the room and really completes the space. Can’t wait for you to add picture moulding to your home!