DIYing Our Garage Floor Epoxy
Epoxy vs. Polyurea Garage Floors
When it comes to garage flooring, most people use “epoxy” interchangeably to mean a few different things. As we did our research, we came down to two options: true epoxy and polyurea.
Both epoxy and polyurea are types of polymer that you apply to floors as a liquid and then let cure until hard. While polyurea is the more expensive option, it’s also significantly more durable. Not only does it last longer (about 15 years compared to 3-5 years), but it also withstands heat and sunlight better without fading or discoloration. We opted for polyurea in the end, and we’re very happy with our choice!
How We DIYed Our Garage Floor Epoxy
Here’s how we DIYed our garage floor epoxy (or polyurea, if we’re being technical!).
STEP 1: Choose your materials.
Once you decide whether you’re using epoxy or polyurea, you need to choose and order your materials. With the kit we chose, we were able to pick colors for both the base coat and the “flecks” to add on top. We went with a dark gray base coat and black, white, and gray flecks for a neutral look.
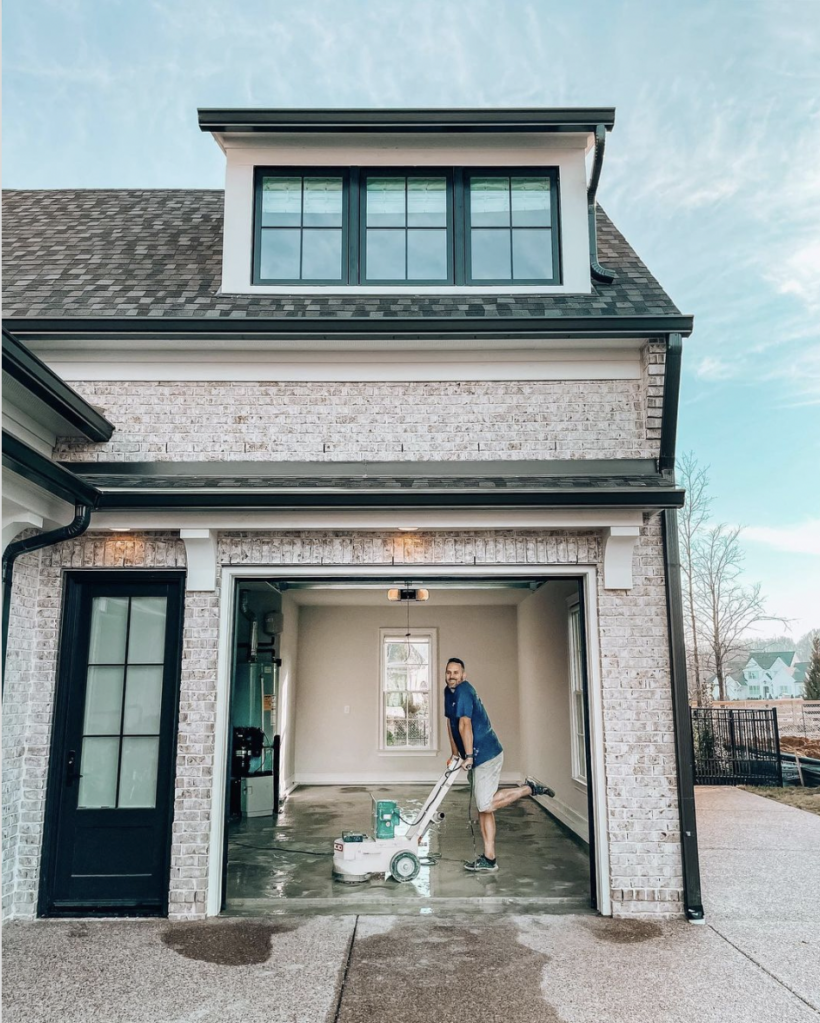
STEP 2: Prep the concrete garage floor.
Next, we prepped the garage. We removed everything, cleaned really well, and then rented a concrete grinder to prep the floor. Grinding down the concrete opens the pores and allows the epoxy to adhere to the floor. After we finished up, we had to wait six days for the floor to dry completely. Be sure to check the instructions for your grinder and your epoxy kit for exact wait times!
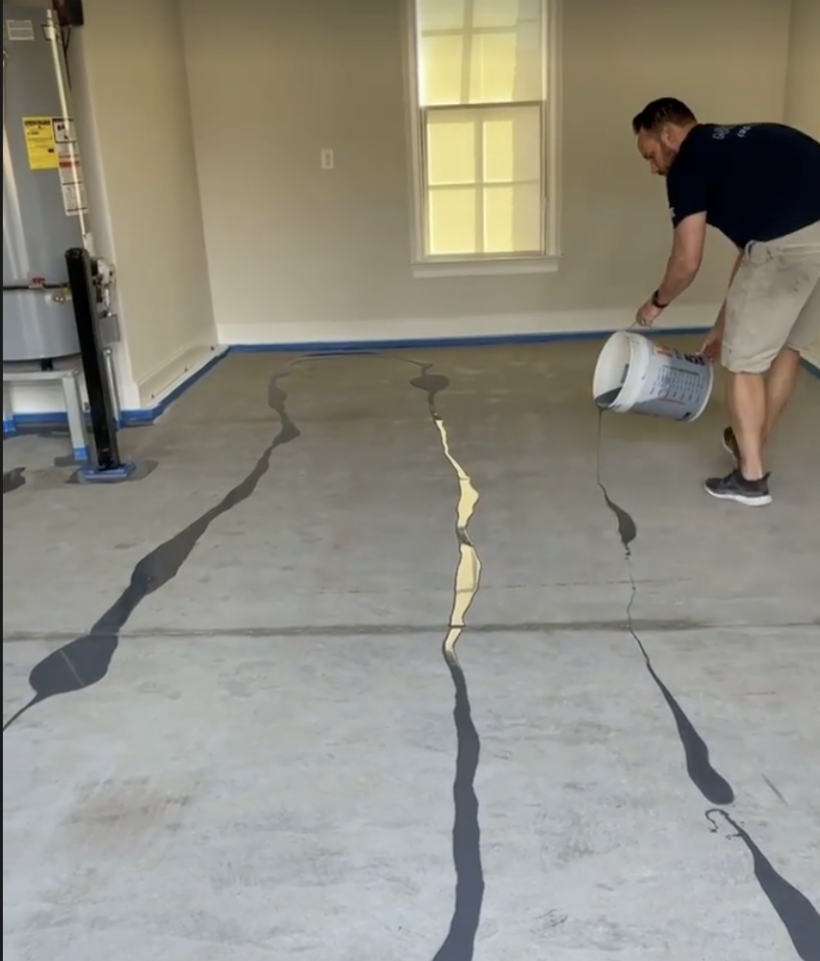
STEP 3: Apply your base coat.
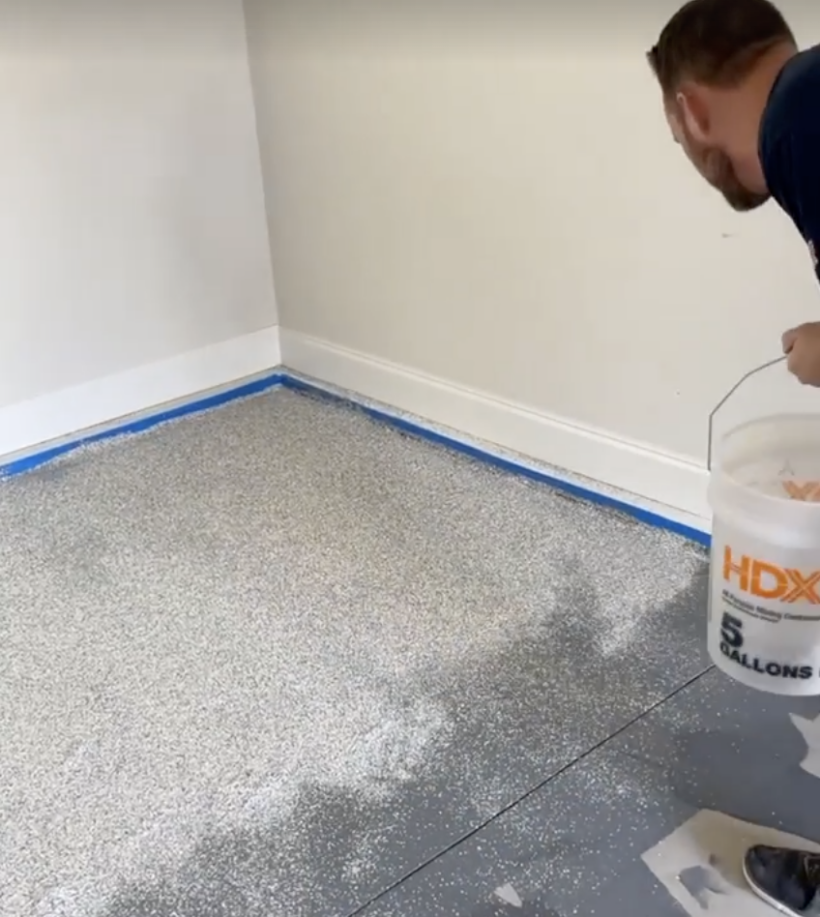
Once the floor was dry, we taped off the edges and went in with our base coat. We used a long-handled paint roller to apply it, and we went in small sections. Keep in mind that you need to sprinkle your flecks in while the epoxy is still wet, so start with small sections and fleck as you go. (Also, don’t paint yourself into a corner!)

STEP 4: Add the flecks.
While the epoxy is still wet, add your flecks. We were instructed to sprinkle the flecks like we were “feeding chickens,” and that system seemed to work well. Different kits will have different instructions, so read carefully!
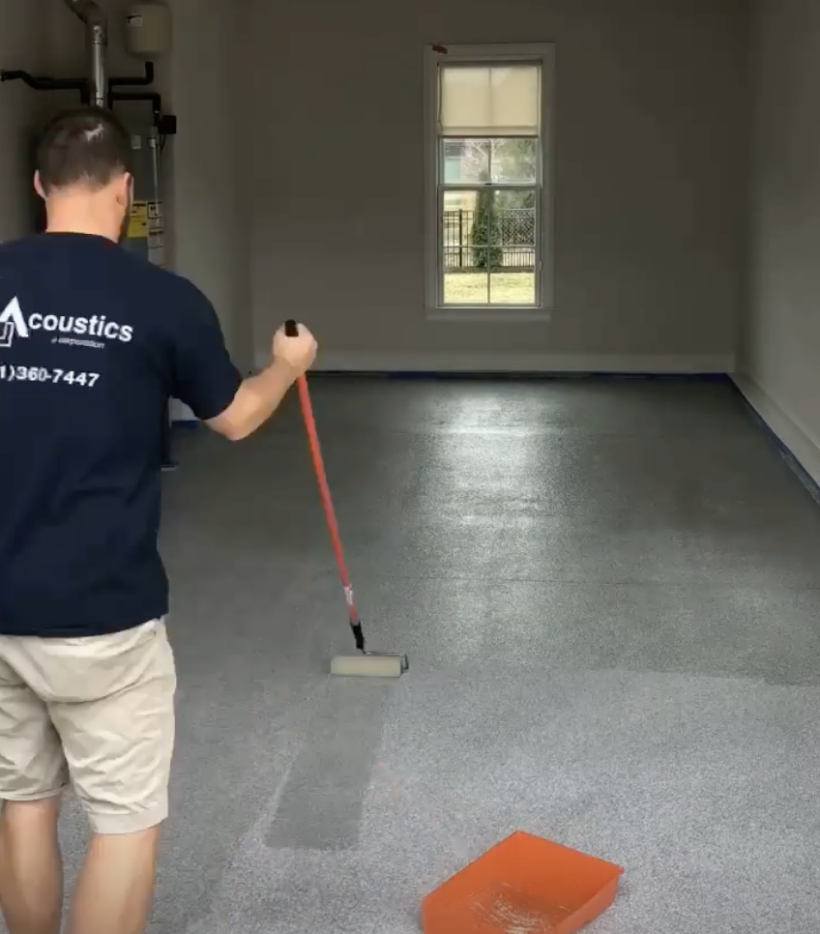
STEP 5: Apply your top coat.
After we worked our way through the entire garage with the base coat and flecks, we waited for the floor to dry and then applied the final epoxy layer. This gives the floor a protective coating and really brings out the shine!
STEP 6: Enjoy your epoxy garage floor!
And there you have it! We are in love with our epoxy garage floor, and we’re so glad we decided to do it ourselves! They’re so nice and clean that you could eat off them (which my husband took a bit too literally…)

How Much Does It Cost to DIY Garage Floor Epoxy?
Cost was a major factor in our decision to DIY our garage floor epoxy. When we reached out to professionals, most of their quotes were in the $5-6k range. But between the epoxy kit we chose (which was admittedly on the pricier side), rented concrete grinder, and extra supplies, we spent about $2000 doing it ourselves. That means we saved at least $3000 doing it ourselves, and if you choose a less expensive epoxy kit, you can save even more!
A DIY project of this scale isn’t for everybody, but it’s definitely worth the time and energy!
For more awesome tutorials from Our Faux Farmhouse contributors, check out these recent posts: