Herringbone Accent Wall With Paint!
Since moving into our house we have been wanting to update our garage bathroom. You may have thought you read that wrong, but you didn’t. Yes we do have a bathroom in our garage. I know this is unusual to some people, however this is actually extremely common in older houses in Florida. We love it because it’s a full bathroom with a walk-in shower perfect for bathing the dogs or rinsing off after a day at the beach. Originally the whole bathroom had plain white walls and I knew I wanted to give it some character. I decided to do a herringbone accent wall. It was a very budget-friendly DIY project and pretty simple to do.
First allow me to introduce myself! Hi I’m Kelsea the face behind the Real Wholesome Life blog. I’ve been sharing our journey of DIY projects and home décor as we renovate our first home for about a year on Instagram, Pinterest, and realwholesomelife.com. We live in the beautiful sunshine state of Florida with our two dogs and couldn’t imagine living anywhere else. Thank you for allowing me to share how I created this herringbone accent wall.
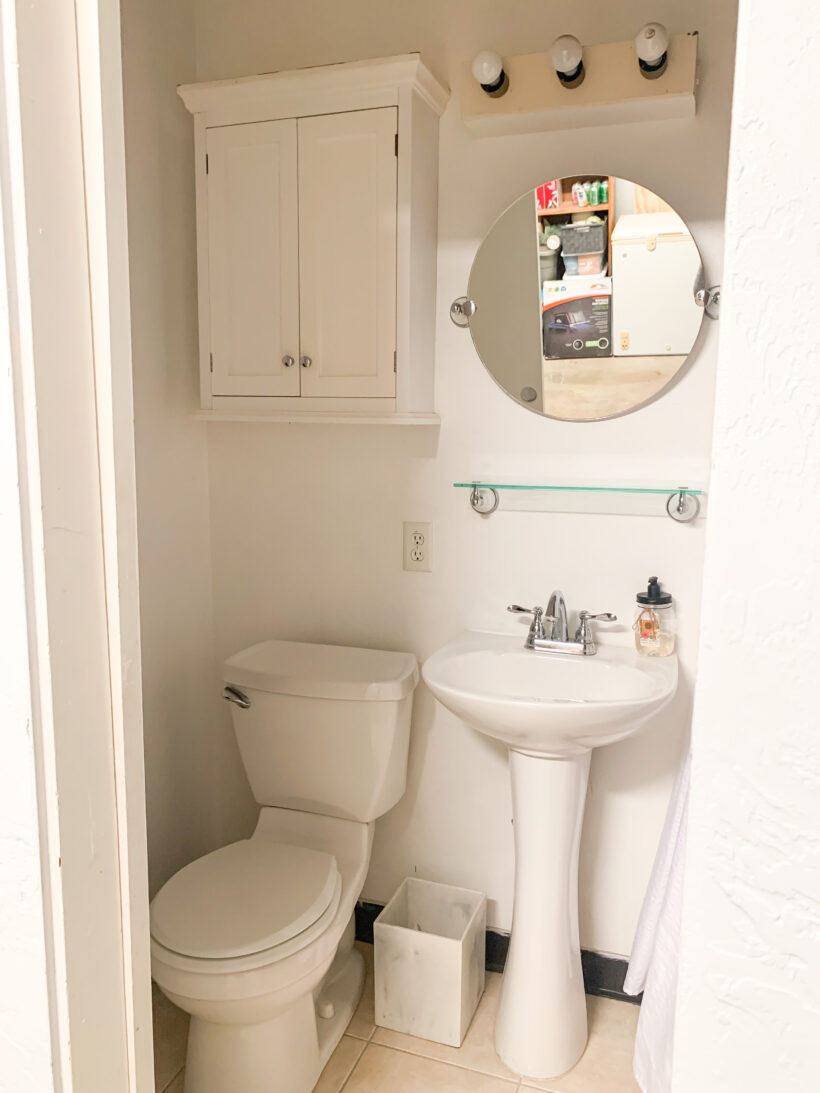
The Before
The whole bathroom had plain white walls and really no style to it before. The shower had been recently updated, so I was mainly just looking to add a little color and décor to the bathroom. I decided to have a little fun with it by creating the herringbone accent wall.
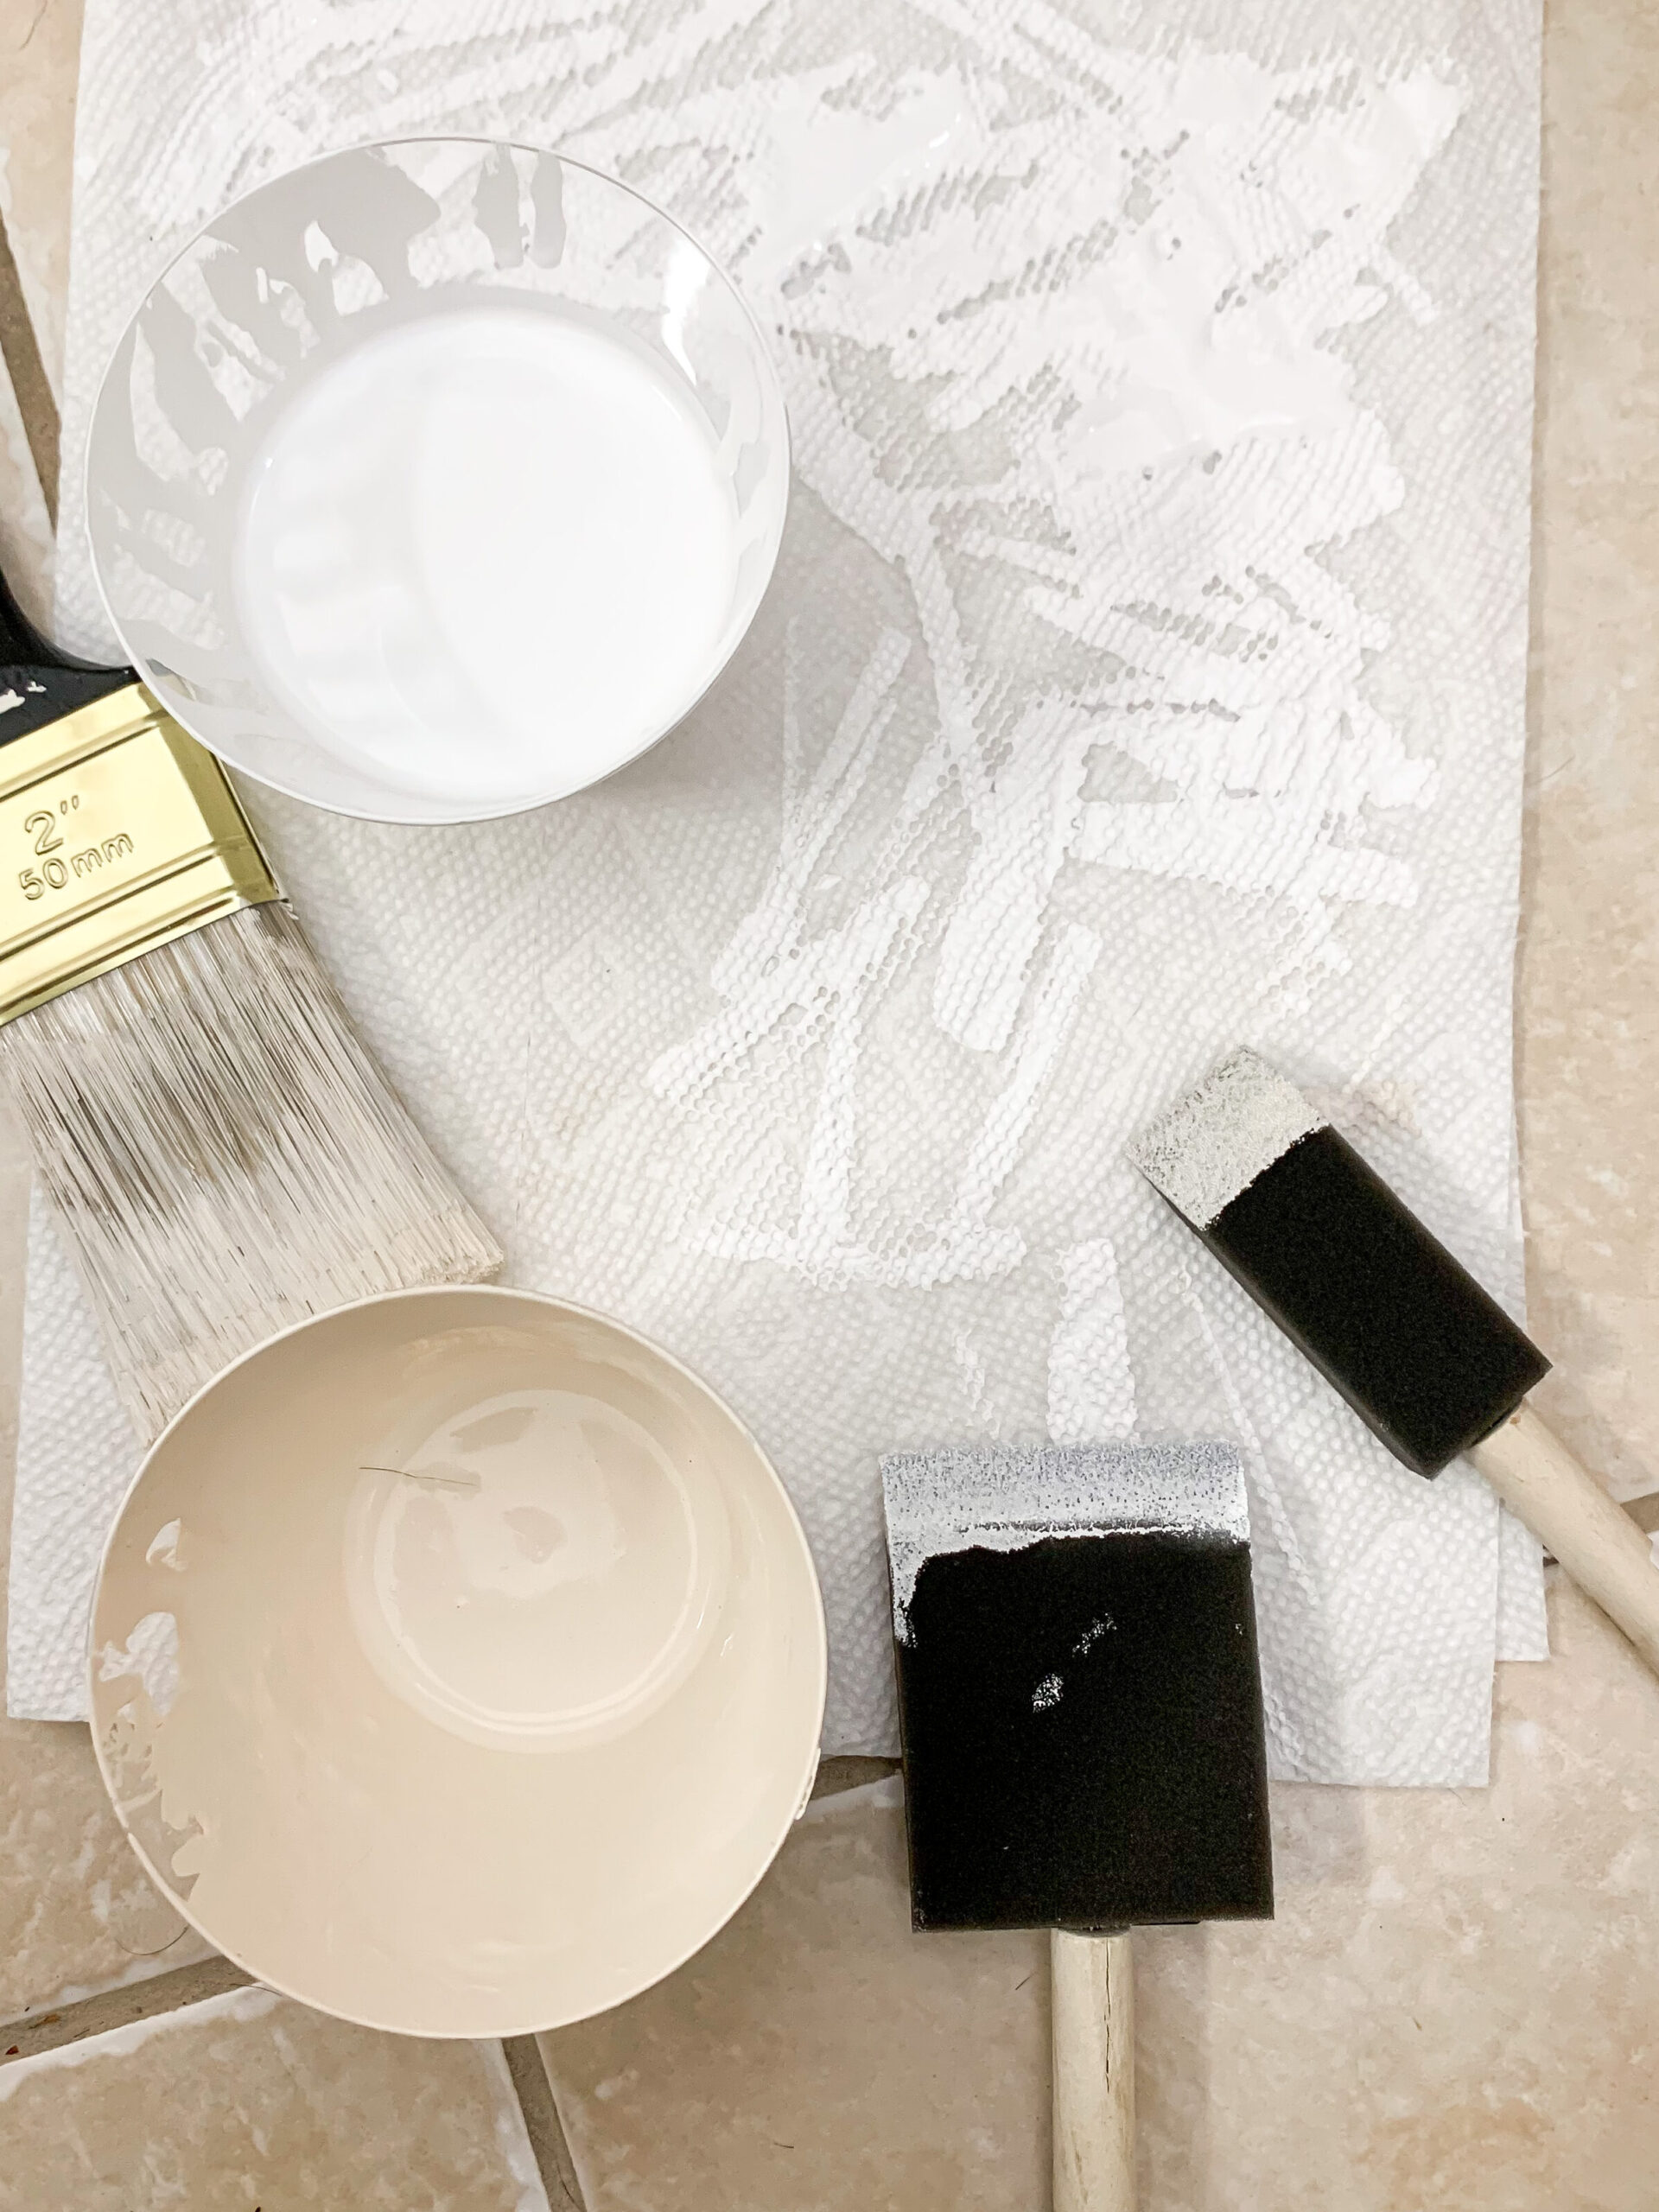
Materials to Paint a Herringbone Accent Wall
- Quart of base wall paint color (I used Behr Cascade Beige)
- Quart of herringbone paint color (I used Behr Ultra Pure White)
- Paint Roller
- Drop cloth
- Paint brush
- 2 inch sponge brush
- 1 inch sponge brush
- Painter’s tape
- Paint tray
- Small painting tray or disposable cup
- Few paper towels
Steps to Paint the Wall
Begin by preparing to paint the entire wall the base color. If the wall is already painted then you can skip this step. Use painter’s tape for any baseboards and the ceiling. Next, place the drop cloth onto the floor to avoid any paint from getting onto the flooring. Open the base wall color you have selected and pour some of the paint into the painting tray. Using the roller brush paint the entire wall the base color. Use the paint brush to paint along the baseboards and ceilings. Once the entire wall is painted allow it to dry completely.
Steps to Paint the Herringbone Accent Wall
Now that the entire wall is painted the base color it is time to paint the herringbone pattern. Pour a small amount of the herringbone paint color into the small painting tray or a disposable cup. Using the painter’s tape create a vertical straight line on your wall about 2 to 2 ½ inches from the start of the wall you are painting as shown below. Have the tape starting at the baseboard or bottom of the wall. The tape doesn’t have to stretch all the way to the ceiling you can move it as you go.

Grab 2 paper towels, the 2 inch sponge brush, and small tray of the herringbone paint. Lightly dip the sponge brush into the tray of paint. Only the tip of the brush needs paint on it you don’t want to have too much. Wipe off both sides of the sponge brush onto the paper towel lightly to remove any excess paint. It is important that there’s not too much paint on the brush to be able to create the pattern and avoid any drips.

Inside of the painter’s tape area, gently place the edge of the sponge brush onto the wall to create a diagonal line. Continue to repeat this process of creating lines on top of each other until you reach the ceiling. Use the sponge for as many lines as you can before dipping it into the paint again. Be sure to move the painter’s tape up the wall with you to ensure you are creating straight lines.
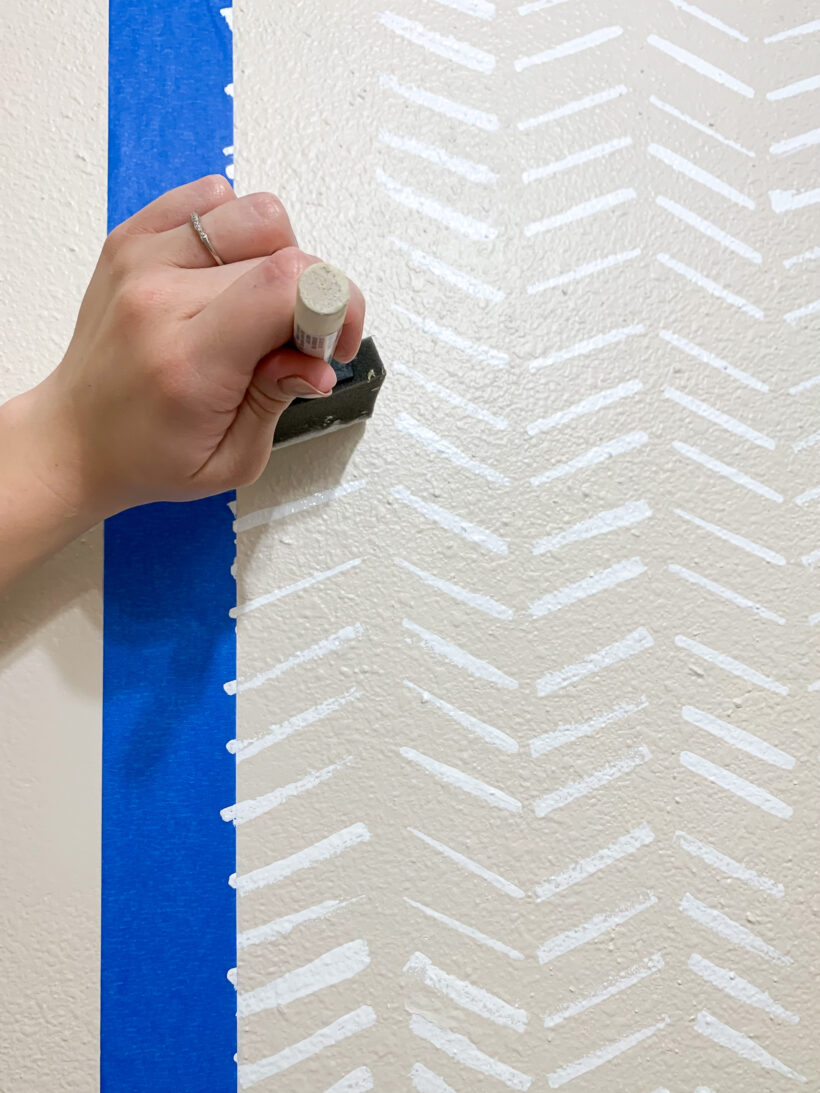
NOTE: The hardest part is getting the pattern started. It might take a couple of tries to get started with a straight pattern going up the wall. Have the base color of paint nearby and you can always paint over the pattern if it starts off slanted and start again.
Once you have created the first row of diagonal lines move the painter’s tape over about 2 ½ inches. Starting from the bottom of the wall again create diagonal lines in the opposite direction of the previous row. You’ll continue doing this until you’ve reached the end of the wall.
NOTE: Use the 1 inch sponge brush with the base color paint for any lines that get messed up along the way. This is an easy way to be able to touch up any mistakes, cover them up, and then go back over it creating a herringbone line again.
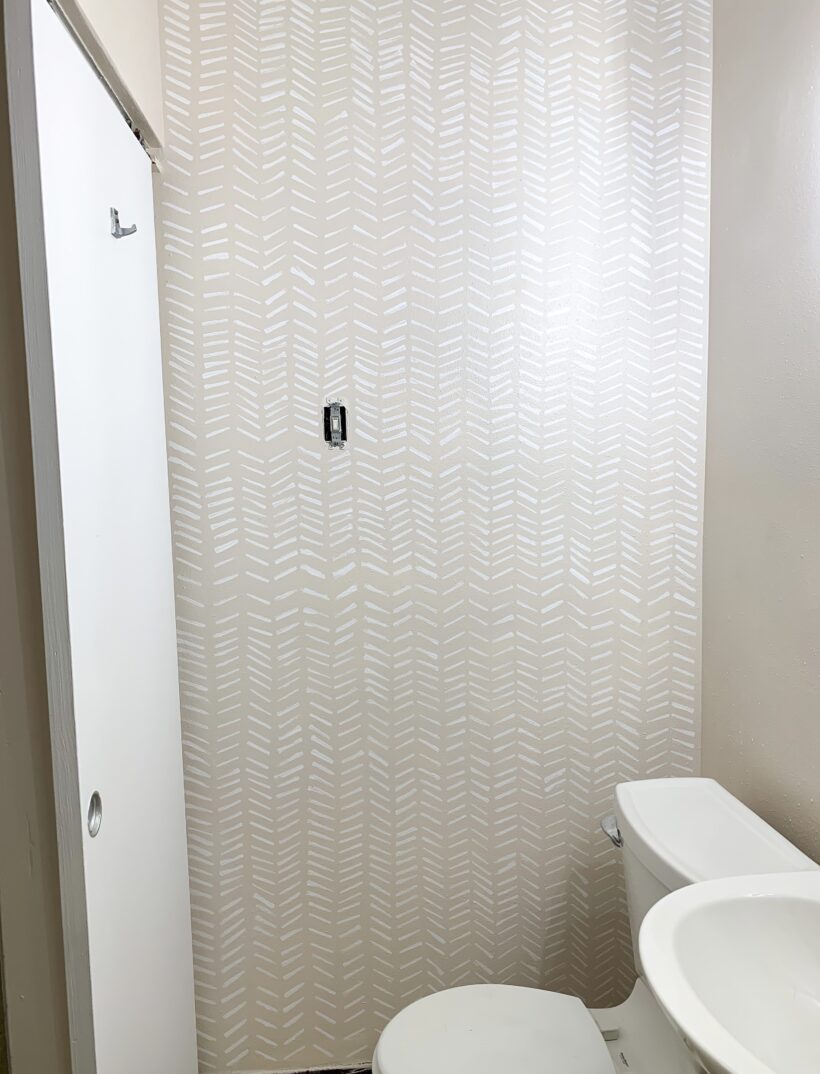
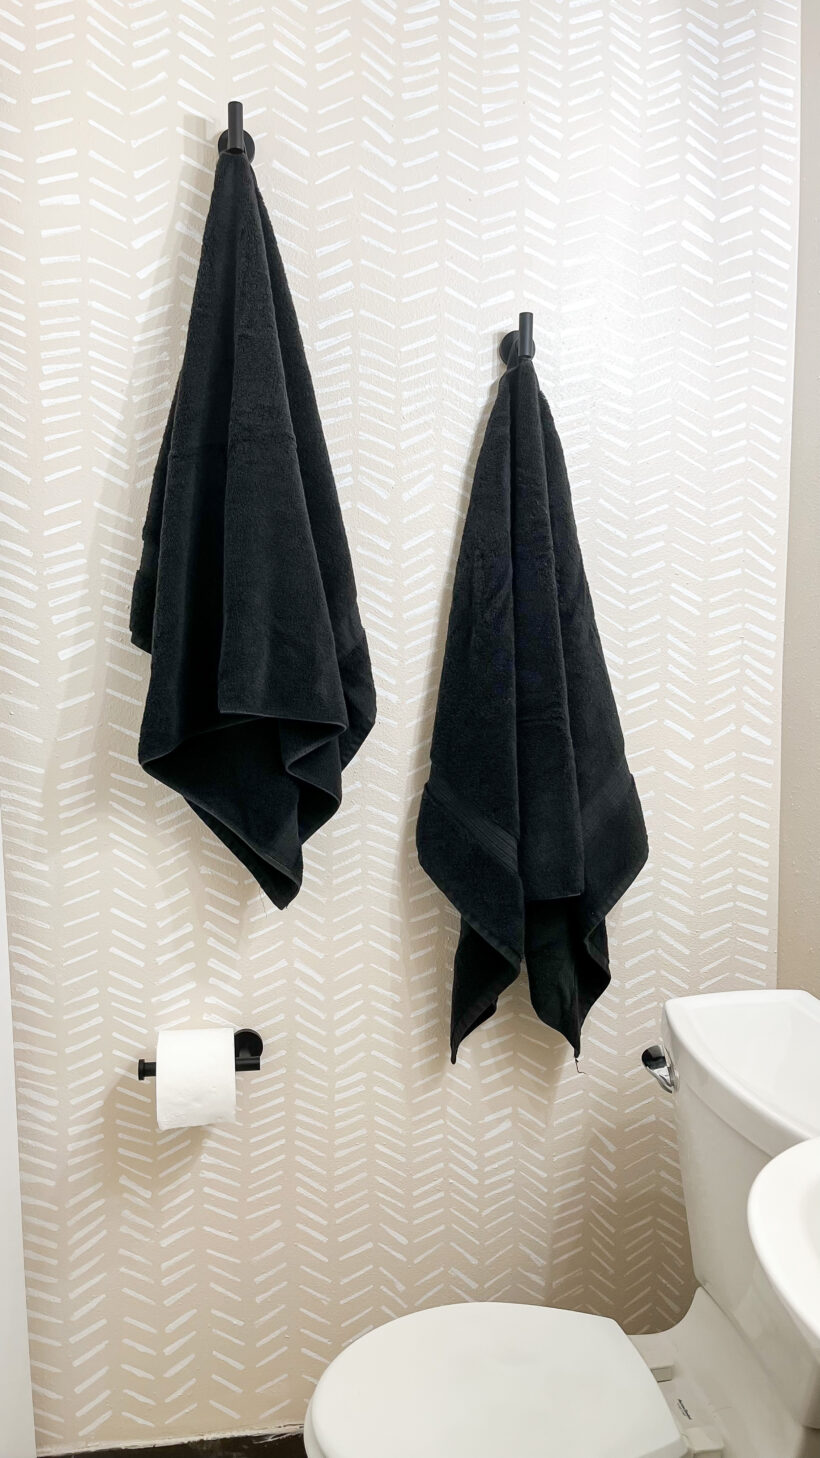
The Painted Herringbone Accent Wall Finished
Once you have finished painting the herringbone pattern allow it time to dry before placing anything on the wall. Our finished accent wall is shown below. We added 2 towel hooks and a toilet paper holder to the wall and it is complete.
I hope you found this tutorial on how to create a DIY painted herringbone accent wall helpful. You can find me on Instagram and Pinterest @realwholesomelife or www.realwholesomelife.com for more DIY house projects and home décor.
Kelsea – Real Wholesome Life