How to Create A Rolling Storage Cart
Anyone who has tried to organize their home plays a little game. You measure the space and spend hours finding the perfectly sized storage solution. Sometimes there isn’t a great solution, solutions are outside of your budget, or they simply don’t fit with your decor. This tutorial shows you how to make a custom solution that is on rolling casters and pulls out easily. This works great for low surfaces, deep cabinets, or laundry baskets. Ready to build a rolling storage cart?!

Rolling Storage Cart Supplies
- Baskets
- Wood (2x2s or 2x4s)
- Paint
- Paint Roller
- Sandpaper (180 and 220 Grit)
- Casters
- Screws (1″)
- Washers (3/16 x 1 1/4)
- Drill
- Optional: Miter Saw and Primer
How To Build A Rolling Storage Cart
Step 1: Cut and Paint Wood
Measure your space. The great thing about this solution is you can make it custom to any odd space you may have. In our home that was under our mudroom sink. I need something that would fit around the plumbing and be easily accessible. This tutorial would also be a great solution for a deep cabinet. To determine what length to cut my wood, I placed the baskets under the sink and then measured the width of the base of the baskets.
If you have access to a saw, you can cut your boards at home. If you don’t, you can also ask the staff at your hardware store to cut your board to size. This is a service many offer and most don’t know about. You need two boards the width or depth of your cabinet. If you have a shallow wide space, you will want to run the boards the width of the space/cabinet. If you have a deep narrow space (like a deep cabinet), you will want to run the boards the depth of the space/cabinet.
Once the boards are cut, it’s time to paint them to blend in with your baskets. In our case, that was black. As I explained in my last post about painting a freezer, preparation is key for a smooth paint finish. Sand the wood with the 180 grit until smooth. Ideally, prime the wood first. Follow with 220 grit sandpaper. Then two coats of paint using the 220 grit sandpaper in between coats.

Step 2: Attach Baskets
Place your two wood pieces parallel to one another. Place your baskets on top of the wood. Adjust the your wood so it’s placed evenly across the basket edges. I chose metal baskets because I wanted ventaliation for my cleaning supplies. You can also use a woven, straw or plastic basket. If your basket doesn’t come with openings to fit a screw through, you can predrill a hole in the bottom of the basket. A little tip, use a hair dryer to warm plastic before drilling or cutting. It will prevent the plastic from cracking.

Using your screws and washer, you will screw through the bottom of your baskets into your wood. I used rather wide washers because I wanted to make sure the screw head wouldn’t slip through the basket holes. You could go the added step to paint or find a screw that matches your basket. In our case, we were going to fill the baskets with supplies and the screws wouldn’t be visable.

Step 3: Attach Casters
When you’re choosing casters, make sure they are narrow enough to fit on your 2×2 (or 2×4). Flip your baskets over and attach the casters to the bottom of the boards. I left the bottom of my boards unpainted so you could easily see the casters in this picture (or maybe because it was just easier).

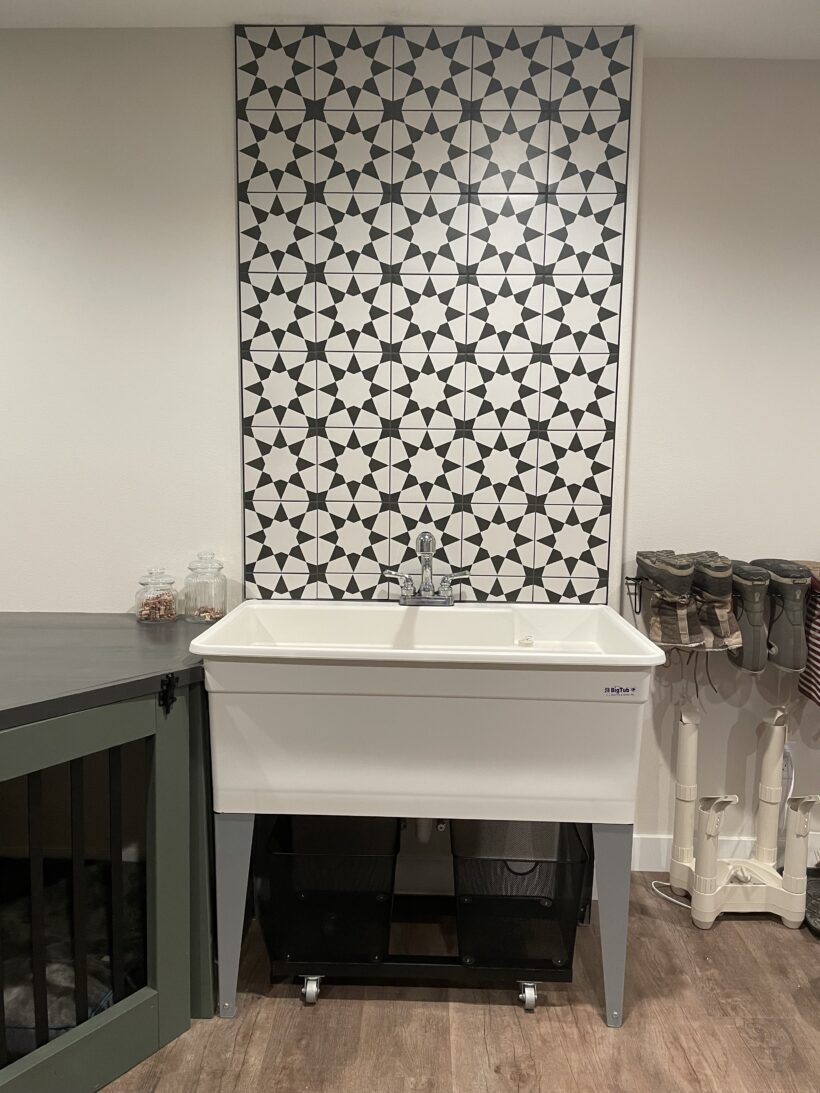
This rolling storage solution is absolutely perfect for the space under our utility sink. It fits around the plumbing and is easy to access even when filled with heavy jugs.
For more awesome tutorials from Our Faux Farmhouse contributors, check out these recent posts: