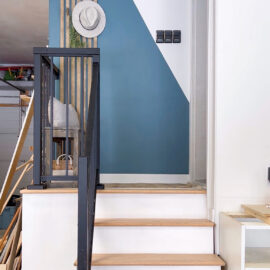
How to DIY Decorative Stairs With Risers
Adding a pop to your stairs not only shows attention to detail, but brings life into this seemingly dull space. We love seeing this design every time we go up or down- it makes the walk a lot more fun!
Today on the blog, we will walk you through every step in this project to add decorative risers to the stairs in your home!


The Materials You Will Need
When thinking of tile installation, mortar and grout most likely popped into your mind- you are not alone. We originally thought about going down this route too, but honestly it’s way easier to use construction adhesive.
With mortar and grout being designed for material like concrete, using it is an unnecessary hassle. Sticking to construction adhesive, your tile will be installed perfectly and in a fraction of the time
Materials For Stairs With Risers :
- Decorative riser tile of choice
- Heavy Duty Liquid Nails construction adhesive
- Sandpaper
The Tools Required
This DIY is simple in theory, but requires a tool many people are intimidated by: a wet tile saw. While it may seem daunting, a wet tile saw is actually much safer than a traditional saw with teeth.
To make you feel better, Brad was also nervous to buy this at first. Now after owning a wet tile saw for a decade, we can’t imagine doing any tile project without it.
Tip: As long as you keep water in the base (to keep the saw wet) and only place your hands on the slider, this tool will be your best friend!
Tools For Stairs With Risers:
- Wet tile saw
- Measuring Tape
- Pencil
How To DIY Decorative Stairs With Risers
As soon as you start with this project, you will realize it’s fairly simple to achieve. While Brad and I planned on devoting several days to finish this, we realized all we needed was a free afternoon and a good mood. With those two things, your stairs will be complete in no time!
The Prep Work:
Before any of the true fun can start, measurements of the stair riser need to be taken. Find the length and height of each step, making sure to account for any that are in corners or appear shorter.
Now it’s time for the actual prep work. Depending on the current state of your stairs, the prep work may vary. In our case, we decided to completely redo our entire staircase and build it from the ground up.
For the majority of you tackling this DIY, all that’s needed is a good sanding to remove any paint finish followed by vacuuming up any of the dust.
Once the prep is finished, it’s time to start working with the tile!
Cutting The Tile:


We already discussed the fear around wet tile saws, but I want to say again that you have nothing to be afraid of! Just keep your eye on the water level and where your fingers are and you’ll be a pro.
But before you get too excited and start blindly sawing tile, lay out the design you want first. Once it looks perfect, measure it to make sure the length and height match that of the stair riser. Then, make marks in pencil on the back to any excess that needs to be cut.
Tip: When cutting the height of each tile, make sure it is a few centimeters shorter than the riser. This way, no matter how much stomping occurs on your stairs, your decorative risers will stay perfect!
Finally, it’s time to put that wet tile saw to use! Use steady pressure to push the tile through and repeat. If your tile measurements are a little off- that’s okay! This DIY is all about patience, so cut yourself some slack if it takes a couple times to get it right.
Installing The Decorative Risers:
We lovingly refer to applying construction glue to tile as: “putting some butter on the back of it!” While it may sound silly, that’s really all it takes.
Apply a generous amount of construction adhesive onto the back of your tile, then place it straight onto your stair riser. Repeat going from one side to the other until your stair riser is complete!
The Final Touches:


The final touch for this DIY is simple: just take a wet cloth and wipe down your tile to get rid of any smearing. With your messy hands touching each tile piece, you’ll want to look at your labor of love and see it sparkle!
Tip: For general cleaning, we try to wipe off our tile twice a month to get rid of any dirt. It’s so easy and takes ten minutes to reveal a beautiful decorative riser.
If you end up installing decorative risers for your stairs, please let us know in the comments! And to keep up with all things Our Faux Farmhouse, check out our most recent posts:


