Master Bedroom Accent Wall Idea | Wood Accent Wall
Wood accent walls are a favorite of mine and for my master bedroom, I knew I wanted something amazing and unique for the wall behind my bed. It was important to me that I did something that would stand out from the other wood accent walls I had seen online. I typically see a lot of squares and straight lines, but on a recent trip for supplies for another project, I saw options for round pieces that I knew I could integrate into a stunning accent wall for my master bedroom!


Before we dive into the tutorial…hi there! I’m Savannah Kokaliares of Savannah Kay Designs. I have been blogging for over 10 years over on ClassyClutter.net. My husband Kyle and I take on DIY projects big and small in our home in Mesa, Arizona. Holly and Brad are our dear friends and it is such an honor to share this fun feature wall on the Our Faux Farmhouse blog today. Thanks for having me, Holly and Brad!
Accent walls are kind of my thing! I have them throughout my home if you’re looking for ideas!
Holly and Brad created this wood accent wall that I’m just obsessed with!


My Master Bedroom – The Before
This is what we were starting with – a completely blank slate! This may intimidate some, but for me it opened up a world of possibilities!


Where To Place an Accent Wall:
The right place to put an accent wall is anywhere you want to accent! Helpful, right?!
In all seriousness, the best wall for an accent wall is usually the one that is most visible or the largest. In this case, I put the accent wall behind my bed because I want it to be the focal point of the room. An accent wall will draw your eye, so it is important to put an accent wall in a spot that is centered and well decorated.
Materials for My Wood Accent Wall:
- Half Round Trim
- 4 inch wood rounds (I found these wood rounds at Hobby Lobby)
- 5 inch wood rounds (I found these wood rounds at Hobby Lobby)
- Nail Gun (I am just obsessed with the Roybi Air Stike)
- Brad Nails
- Level
- Pencil
- Paint color of your choice (I used Behr Wanderlust!)
I cut the half round into three different sizes, 13 1/4 inch, 18 1/4 inch and 28 1/2 inch.


I practiced the layout on the floor first to make sure I loved the pattern. I played around with this for awhile until I landed on the final pattern that would fit my wall perfectly.
TIP: You will need to measure your wall to see how many complete patterns you can make within your space. Don’t forget this part! I marked the entire wall with pencil so I had all of my cuts ready to go.


Steps to Recreate This Wood Accent Wall:
I cut two of the 5 inch wood rounds in half and then I cut 3 of the 4 inch rounds in half as well. Then, on the wall, I used a level to find the center of the wall mark a line from the ceiling to the ground.


I followed along that line and I nailed a half of a 5 inch wood round.


Then I added the 18 1/4 inch piece!


Next, I nailed on the 4 inch wood round.


Then, another 18 1/4 inch piece.
I made the “T” from the center of the 4 inch wood and then continued to build onto the square.


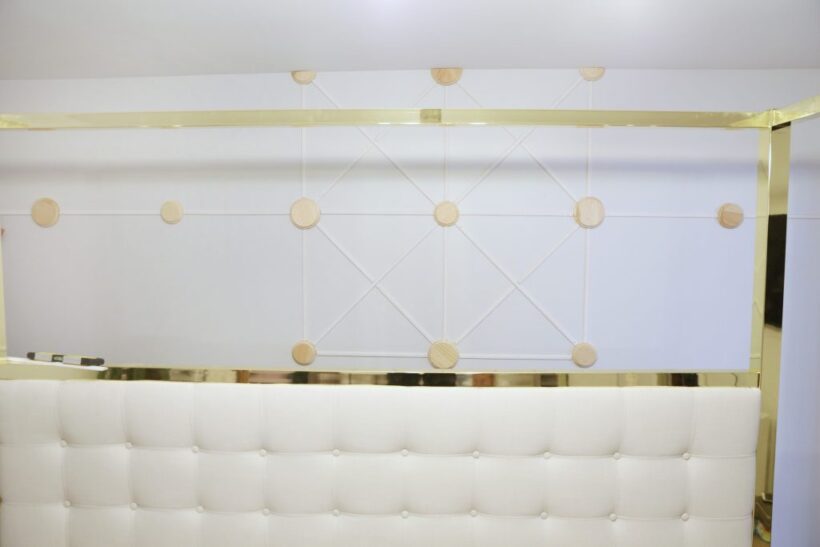

It took a bit of patience but I promise it was worth it!! I did have to fill all the nail holes which took some time, but it is the small tedious tasks that take your project to the next level. Professionals always fill their nail holes, and you should too!
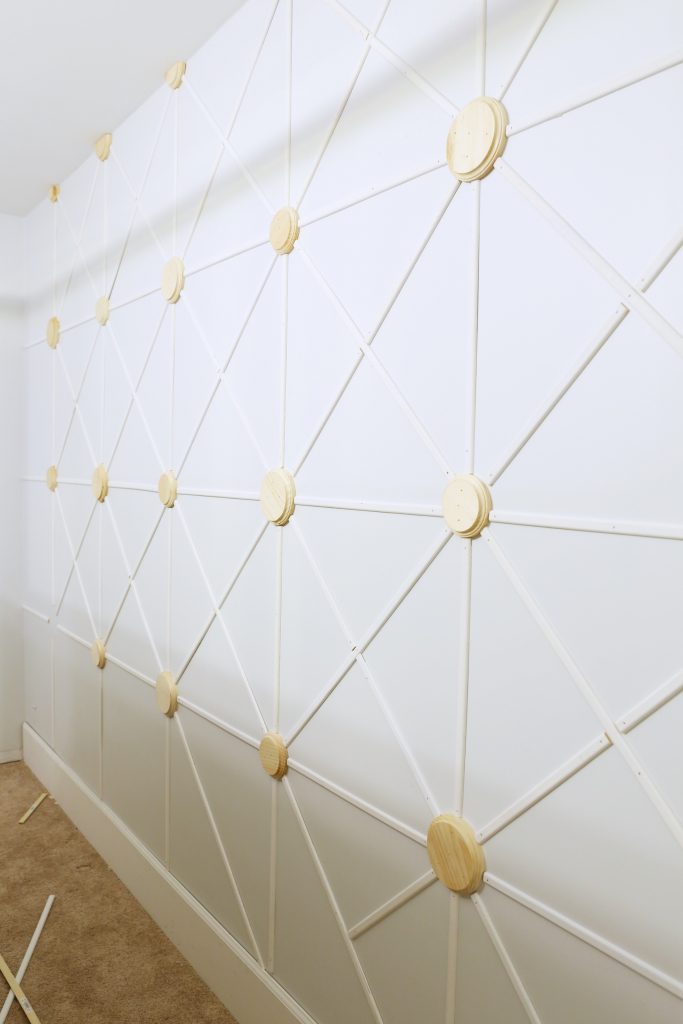

What I love so much about wood accent walls is that a coat of paint can change the entire look! We originally painted this room a deep green blue (Behr Wanderlust), but just a few months back, I was ready for a change after adding french doors to this room.
I love that a simple paint color change can completely transform a room. The accent wall looks great in this color, too!
I’ve listed all of the sources for this room right here.


I hope this gave you an idea for your Master Bedroom Accent Wall! Feature walls are such a great way to add interest to your space and I promise – the hard work is WORTH IT!

