Wood Slat Accent Wall


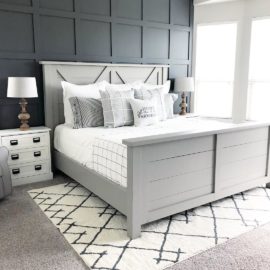
Our Master Bedroom Before The Wood Slat Wall:
Here’s what we started with. During 2021, we built our dream home! To save on costs we painted the house ourselves, can you believe it?! Every wall is Sherwin Williams “Pure White”. This created our “blank canvas” for us to add fun DIY finishes on a budget while we live here and make each space more unique.


Materials To Create A Wood Slat Wall
- Paint and painting supplies (I used SW Iron Ore in Flat)
- 4×8 sheet of stainable Plywood (I used 3/4″ thick Red Oak)
- Table Saw
- Orbital Sander or sandpaper
- Stain and stain brush or rag (I used Minwax Weathered Oak)
- Nail gun, pin nails (2″) & air compressor
- Measuring tape
- Level
Here are the steps to recreate our Wood Slat Wall:
STEP 1: Paint your wall!
For this project we started by pulling our bed and nightstands away from the wall, taking off the outlet covers, removing the roller blinds from the windows and wiping down the wall, baseboards & windows with a damp cloth. I cut in the edges with my favorite Wooster Shortcut paint brush while my husband Tyler rolled the walls. After 2 coats, the white wall (SW Pure White) was transformed into this beautiful moody grey (SW Iron Ore)!


Here is our favorite paint!


STEP 2: Rip plywood into strips
We headed to Home Depot and looked at the different stainable plywood options. You can chose either 1/2″ or 3/4″ thick plywood, we decided to go with 3/4″ to give us more dimension on the wall. The 2 best options were either Birch ($79/ sheet) or Red Oak ($89/sheet). We decided on the Red Oak since all of the other wood finishes in our new home are White Oak. We ripped the sheet into 1 inch strips and were able to get 39 strips from one 4 x 8 sheet. This was the hardest part of the project and definitely a 2 man job since the plywood was so heavy.


STEP 3: Sand and stain the strips of wood


Tyler used our Rigid orbital sander first with 150 grit sand paper and then again with 220 grit to smooth the top and the cut edges to get rid of any sharpness and potential slivers.
As he completed strips I brought them inside and stained them on our island on top of a drop cloth. I used Minwax Weathered Oak. I brought them inside to stain because it was cold outside and I wanted them to dry quickly. As you can imagine, this was very stinky and we had to open all the windows to air out the house for several hours.


My recommendation would be to stain outside if at all possible. Also, leave the boards outside for a day or two after staining if possible to allow them to air out. If you bring them in the house immediately, you will bring the stinky stain with them!
We chose not to apply a clear coat, but this is where you would do that if you’d like to. Add a clear coat if you’re worried about people touching the wood a lot or if the wood will need to be cleaned regularly.
Since the wood is on a wall behind our bed in a master bedroom, we didn’t feel a clear coat was necessary.


STEP 4: Nail up the slats! (The fun and easy part!)
We started by marking the center of the wall between the 2 windows. We then nailed up the first slat on the middle mark using a 4′ level to ensure it was perfectly straight and plumb. Then, we turned a slat on its side and used it as a spacer (3/4″ thick plywood = 3/4″ thick space in between slats).


Continue nailing up slats using the slat turned on its side as a spacer in between each piece until they’re all up. We did periodically check our plumb with the level. We stayed level throughout so we didn’t’ need to make any adjustments.


We used our favorite DEWALT 23- Gauge 2″ Pin Nailer for this project. We love this nailer because the nails are headless therefor leaving the tiniest nail hole that you really have to search for to see. Because of this, we opted to not fill the nail holes.
If you need to use a bigger nail with a head that leaves a hole, you would need to fill the holes, sand and touch up your stain at this point.


I hope this tutorial helps give you the confidence to create your own slat wall or something similar in your home. Don’t forget, you never know what you’re capable of until you try!


Are You Down To Try This Wood Slat Accent Wall?
If you want to try wood slat accent wall and have any questions or want to see other projects from our house, follow us on Instagram @buildingsimonsen.


