How To Paint An Accent Wall Using An Art Projector
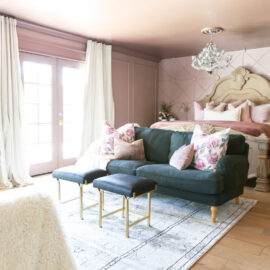
This is one of the easiest accent walls I’ve ever done, and I don’t consider myself an artist! I saw this photo on Instagram months ago and loved the fun wall:

I wanted to add something fun to our daughter’s new room, and I knew I wanted it to be UNIQUE. No more board and batten, no more shiplap. Time for a FUN wall she would remember. But since I’m not an artist, I was worried about painting a design onto a big wall. Jonathan suggested we use an art projector to blow up the image onto the wall. Genius!!
Today on the blog, I’ll discuss every step of using an art projector to make an accent wall so you can recreate it in your own home!
The Materials Required
The most difficult aspect of this entire project is finding an art projector to use. While you may not have one on hand, ask around! From online community groups to just family and friends, you’d be surprised what kind of stuff people have lying around.
Art Projector Wall Materials:
- Art Projector
- Pencil
- Image/Design on your computer
- Paint
Art Projector Wall Steps: The Quick Version
While I encourage you to read the details to ensure a smooth experience from start to finish, some of you may prefer the abbreviated version if you are art projector masters.
Project Steps:
- Connect your computer to the projector
- Resize the image onto the blank wall you want to paint
- Use your pencil to trace the design
- Paint the design onto the wall!


How To Create Your Art Projector Wall
Find an image or design you want to use. Search Pinterest or other places online for inspiration.
This next part is the trickiest—using the projector. If you don’t have a projector, this method won’t work easily. Ask around and see if anyone you know has one or something similar to use. The wall I wanted to paint was a giraffe/cow pattern, so if I didn’t have a projector, I probably would have printed out large pieces of the design on computer paper, then taped them together on the wall.
I had to shift the projector around a few times, since my image didn’t fit the entire wall perfectly. In the end, it was mainly painting random blobs and circles, so I knew it couldn’t go horribly wrong!
Then, lightly trace your pattern directly on the wall. I had a few pencil marks show up dark, but my paint covered them.
You can turn off the projector after you trace the shapes, because the final step is painting!
The Final Result

My daughter’s fun room turned out amazing! You really can’t go wrong painting random cow patterns onto the wall. She’s only two years old, but she’ll be moving to a “big girl” bed and out of the crib in a few months!
If you are considering taking on this DIY, trust me and give it a go! One of the many great things about paint is that it can just be covered up, but the art projector makes it simple for even the newest home improver.
Follow along for more fun projects and tips at @jonathanandjenna on Instagram and TikTok!
Please let us know in the comments if you end up using an art projector to make your own accent wall! And to keep up with all things Our Faux Farmhouse, check out our latest posts: